Resources
Let Claude edit your videos
I gave Claude a raw 1 minute 39 second clip and it returned a finished 52 second edit with captions, motion graphics, sound effects, a grade and a cover. This is the full setup for beginners, with both prompts and what it took in tokens.
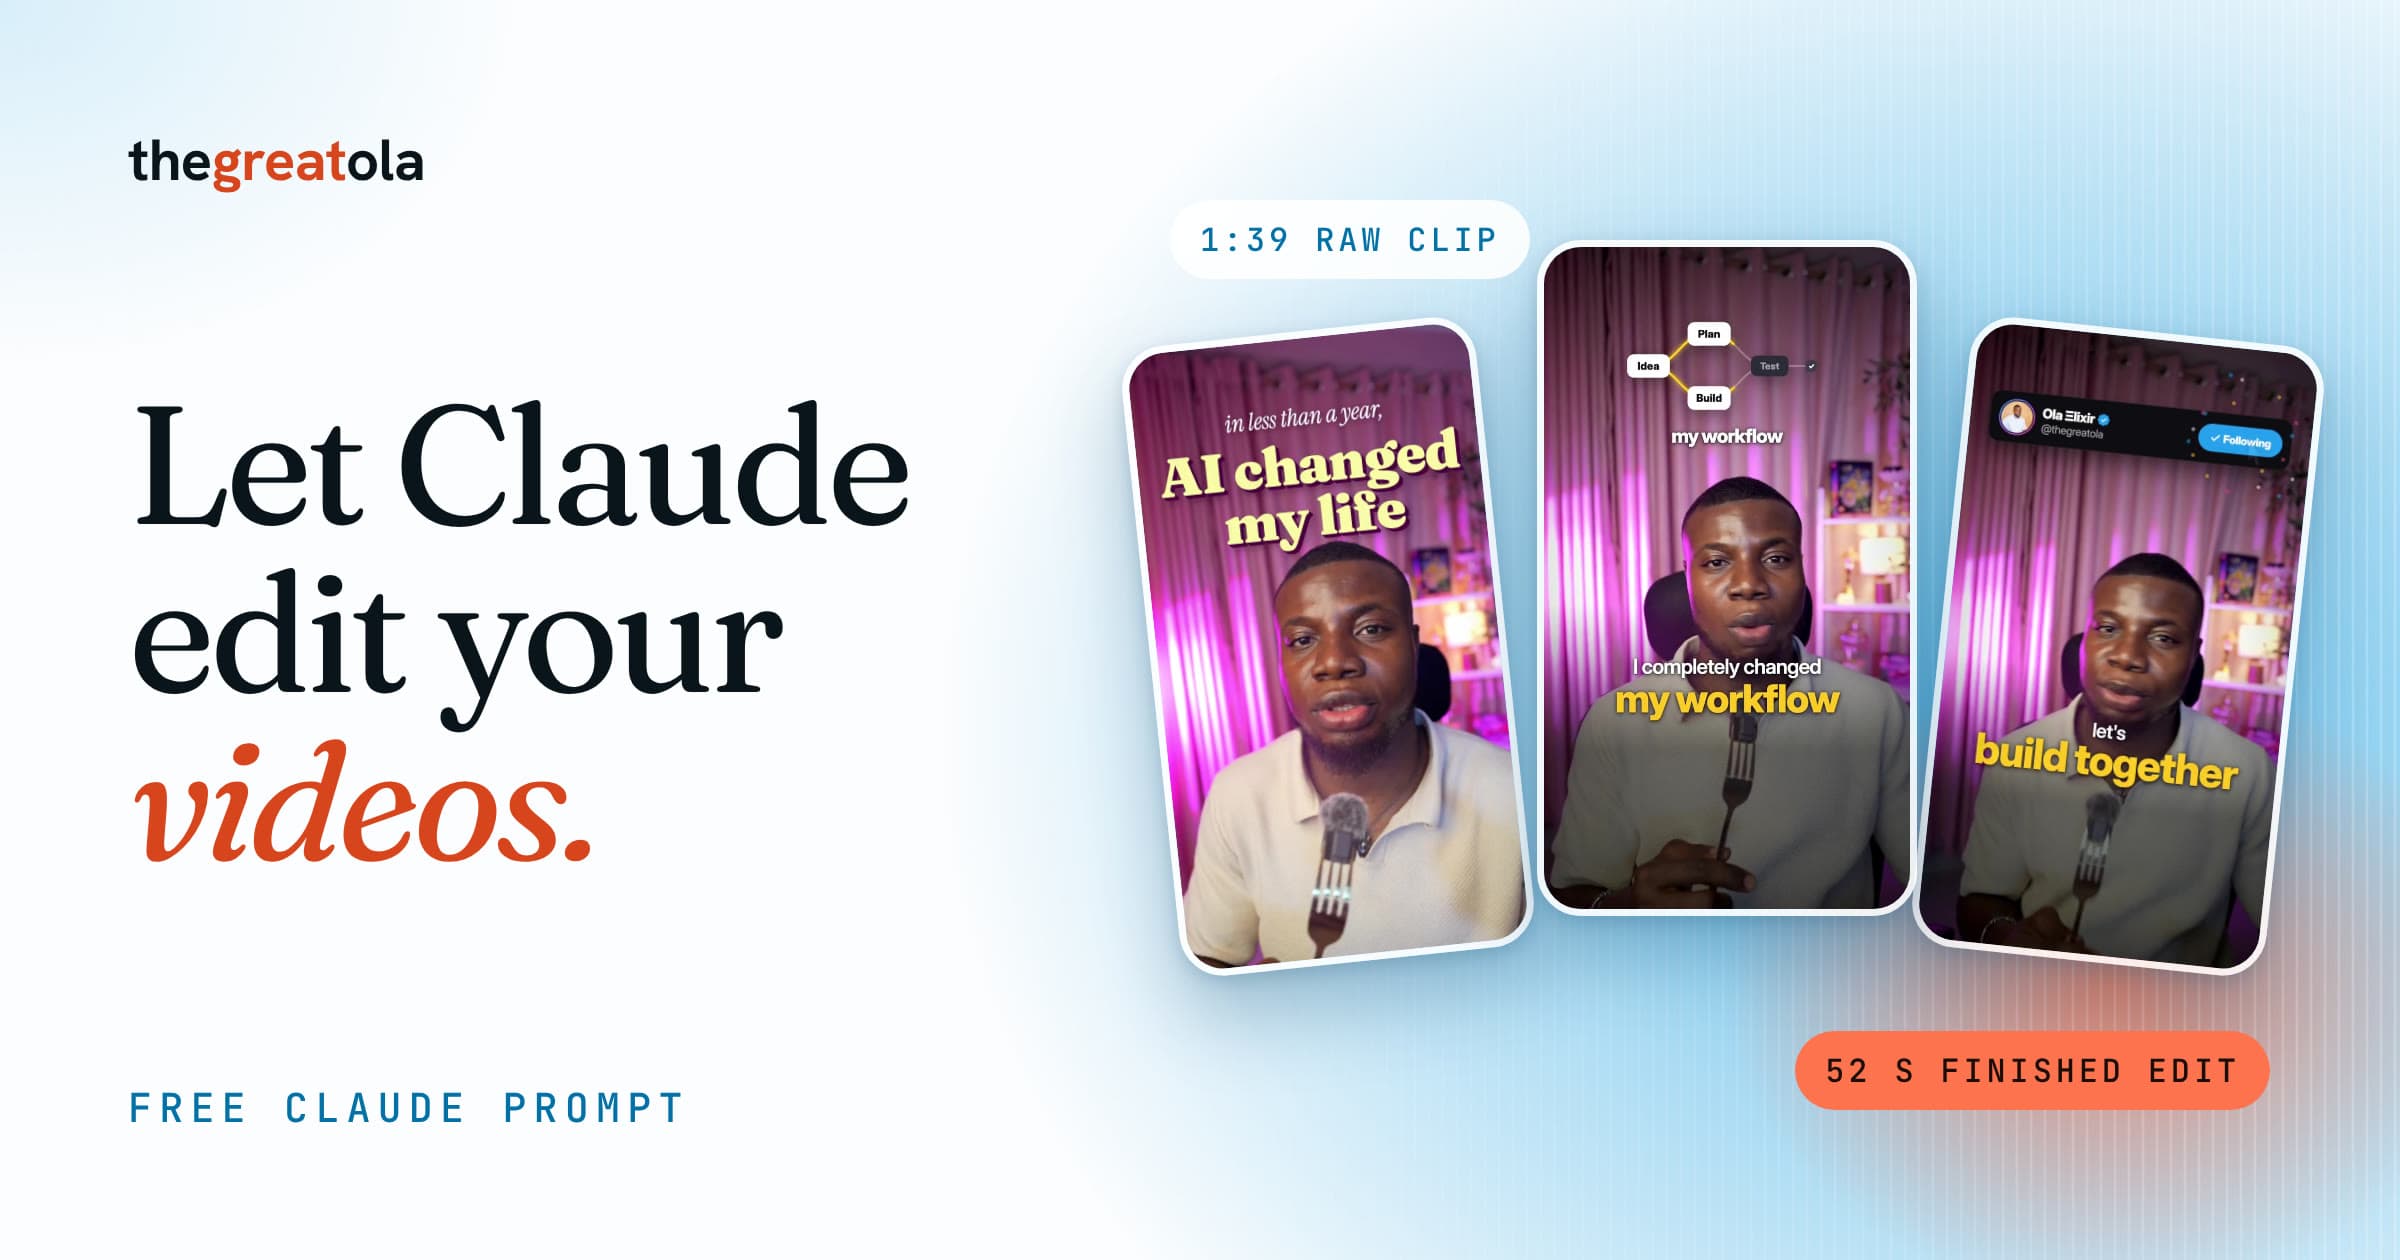
I filmed a 1 minute 39 second clip of myself talking and gave the file to Claude Code. It cut the pauses and retakes, added captions, illustrated 12 of the ideas I mention with animated scenes, added 62 sound effects timed to the motion and mixed the audio to -14 LUFS. The finished video is 52 seconds, 1080x1920 at 60 fps.
I never opened CapCut. My part was notes: change this motion, redo the cover, fix the ending, use my real profile picture, export at 60 fps. For that last one it opened my X page in Chrome and took the picture from there.
How to use it
- Install Claude Code and open it in a new, empty folder.
- Install the video skills listed below. Claude does the installing when you give it the GitHub links.
- Optional: point Claude at a creator whose edits you like and turn their methods into skills.
- Paste the setup prompt. It installs Remotion, ffmpeg and Whisper and renders a short demo to prove it works.
- Paste the edit prompt with your clip, your hook and the words you want illustrated.
- Check the still frames it shows you and give notes the way you would to an editor.
- Post the final 1080x1920, 60 fps file. Keep the small preview for checking only.
What you need
- Claude Code, in the desktop app or the terminal, with a paid Claude plan or an API key.
- A raw vertical clip at 1080p or 4K. The higher the resolution, the sharper zooms stay.
- Free disk space for renders. Each version of my 52 second video was a new file.
- Optional: Chrome with the Claude in Chrome extension. Claude used it to take my real profile picture from my X page.
Install the skills first
Skills are folders of instructions that Claude loads when a task needs them. I started with ready-made video skills from GitHub and added my own as I went. You can install any of them by telling Claude: Install the skills from [GitHub link] into .claude/skills in this folder.
- Remotion's official skills: animation, captions, transitions and rendering. Install them with npx skills add remotion-dev/skills.
- video-use by Browser Use: transcribes, cuts, grades and burns subtitles through conversation.
Learn from creators you like
Most of the techniques in my edit came from studying creators whose videos I liked. Claude watched their videos, measured the cuts, captions, pacing and sounds, and saved each technique as a skill it reuses on my footage.
My Turn X pages into skills prompt does this for any X account. Learn the methods, then make them your own so your videos still look like you.
Build me a video editing toolkit with Remotion and set it up end to end.

First install these skills into .claude/skills: Remotion's official skills (npx skills add remotion-dev/skills) and video-use from https://github.com/browser-use/video-use. Read them before building anything.

Goal: I send a raw vertical talking-head clip, you return a finished 1080x1920 edit.

Pipeline:
1. Transcribe with Whisper (word-level timestamps). Fix misheard words.
2. Cut pauses and retakes with ffmpeg.
3. Write an edit plan (JSON) from the transcript:
   - hook title over the first line, also used as the cover frame
   - key phrases big in an accent colour
   - negative phrases struck through in red
   - every concept I name gets its own animated illustration
4. Captions: one fixed position for the whole video, short phrases synced to my voice. When an animation already explains a sentence, leave that caption off.
5. Sound: a short effect on the exact frame each motion starts. No background music unless I give you a track, because I add my own.
6. Even colour grade across the whole frame with light sharpening and no vignette. Mix to -14 LUFS. The final file is always 1080x1920 at 60 fps: if my clip is any other frame rate, rebuild it to 60 with ffmpeg motion interpolation (minterpolate, mci mode) before rendering, then check still frames for warping. Render with Remotion at 60 fps at a high bitrate (H.264, CRF 16 or lower, AAC 320k). Keep my clip's extra resolution until the final render so zooms stay sharp. Never export below 1080p.
7. End on my profile card with a cursor tapping Follow.

Fonts: choose a type style that suits me. Don't default to italic serif headlines.

Rules: show me still frames before the full render, never cover my face, show one thing at a time, and save every technique as a reusable skill in .claude/skills so the next video is faster.

Install what's needed (Node, ffmpeg, Python, Remotion), then make a 5-second demo to prove it works.
Here is my raw clip: [PATH TO YOUR VIDEO].

Edit it with the toolkit. My hook is: [YOUR FIRST LINE OR TITLE].
The words I want illustrated are: [CONCEPTS YOU MENTION].
End on my profile: [YOUR NAME AND HANDLE].

Show me still frames first. After I approve, render the full video at 1080x1920 and 60 fps, with sound effects and no background music. Put the final file in its own folder and tell me exactly where it is.
Final touches
These are all in the prompts above, and they're worth checking on your own edit before you post.
- Fonts: ask for a type style that fits you. Claude often reaches for an italic serif headline by default.
- Colour: keep the grade even across the whole frame, with light sharpening and no vignette, so the picture stays clean.
- Captions: pick one position and keep it for the whole video, so animations never push them around.
- One thing at a time: when an animation already explains a sentence, leave the caption off for that line. Watching both at once splits attention.
- Music: sound effects need music under them, because on their own they sound empty. I add my own track after the edit, so I tell Claude to leave music out and keep the effects. If you want Claude to add it, give it a track you have the rights to.
Tokens and time
- Every call ran on Claude Opus 5.5.
- Each round of notes, like redo the cover or use my real profile picture, took 9 to 21 calls to Claude.
- My session had been open for two days, so every call re-read about 800,000 to 900,000 tokens of earlier conversation. One round of notes came to about 8 to 18 million input tokens, almost all of it read from the prompt cache, which the API bills at a lower rate than new input.
- Rendering used no tokens. It ran on my MacBook. For the 52 second video, rebuilding the footage to 60 fps took about 30 minutes and the final render about 10, so check still frames first and do the full render once your notes are finished.
- Start a new Claude Code session for each video. The history stays short, so each call re-reads far less. Your skills and style carry over because they live in files.
Before you post
- Check the file you post is 1080x1920 at 60 fps before you upload it.
- Upload the 1080x1920 file. A 720p preview looks soft once Instagram or X compresses it again.
- On Instagram, turn on Settings, Data usage and media quality, Upload at highest quality.
- The first video takes a few rounds of notes. Ask Claude to save each technique as a skill so later videos start from your style.
Newsletter · Staying Liquid
Read Staying Liquid.
Where I break down crypto, markets, and what I’m actually watching and shipping. Free, in your inbox.
Opens Staying Liquid to confirm. No spam, unsubscribe anytime.